

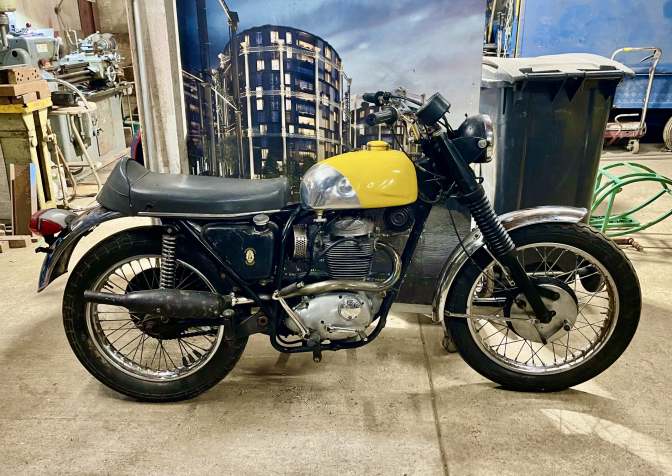
A BSA B44 Foster Otter...
Trials bike build...
09/04/2024...
Photos Courtesy Otterman...
With the BSA B44 now stripped down and engine out, I am fired up to get this build done too…
I have got most parts to get Two Foster BSA C15 Otters put together just a few more parts to powder coat… But in the mean time after reading Mike Waller's email this morning (below) I also want to get this B44 together. I could use one of the built up Foster Otter frames, but I want to use a
1 1/2” down tube on the frame for this bike, just because in my head I feel it will take the torque from the motor better.
And I want to make a better third mounting point for the cylinder head… Just guessing what Harry would have done using a B44 engine.
So do I go the Mike Waller route and use a Honda Transalp piston… or plump for using a BSA B40 7-1 cr piston and a small compression plate… Going this route would help me to get the engine back together without a lot of machining which I love, but want to get this bike built right now and not another long term project…
If using this engine works I have another round barrelled B44 engine, that I could also build into this specification. But It needs a liner fitted to the barrel for a good job. And I also have a friend that needs to fit one too.
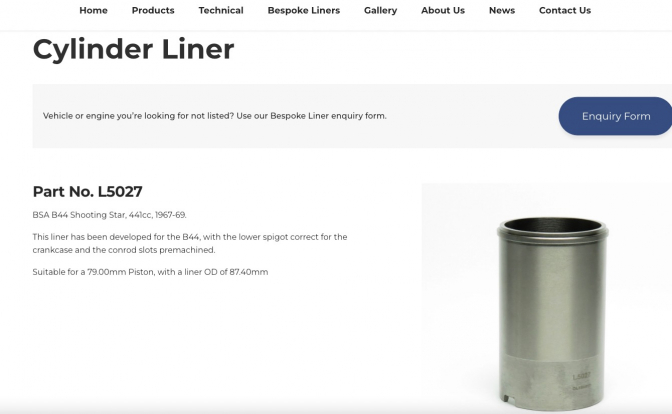
So doing a bit of homework I find that Westwood Cylinders have developed a liner just for the BSA B44 so with a bit of engineering we both can fit new liners one for a B40GB motor, and mine another B44…
https://westwoodcylinderliners.co.uk...
One most important thing that I must add is that a BSA B44 barrel liner can not be pressed out they have to be bored out to the size needed to fit the new liner... as the original liners were cast in and have ribs to stop them moving... Just BSA again, the B25 and I am told B50 liners are press removable, (when heated ) and in fact I have a couple of B25 liners here to fit... So Don't try pressing out those B44 liners, bore them out on your Bridgeport with a boring bar, and don't over bore them, or you are looking at scrap or a Big bore kit...at least and they are expensive...
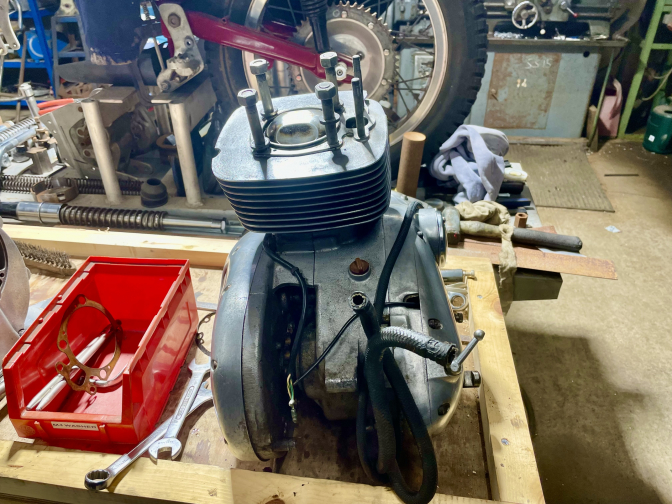
BSA B44 engine with the cylinder head removed ...Do I fit a BSA B40 7-1 piston, and an 1/8" compression plate to bring the engine to perform more like a trials bike. I think we will try this first...
Right so I must now go and get the valves ground in today..
So more later on the build…
01/05/2024...
Well... I well and truly fell into the trap of reading old magazine (Blue-un I think) articles... thinking I would build this B44 like The Comerfords one in the write up of the Jock Wilson built bike...
(in Army to Victor-y ) page ... And this seemed the way to go...
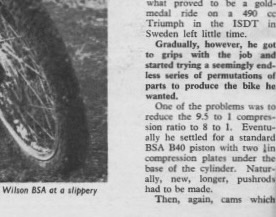
It reads "One problem was to reduce the 9.5-1 compression ratio to
8-1... He settled on a standard BSA B40 piston with two 1/8" compression plates under the base of the cylinder. New longer push-rods had to be made, cams were SS90 and followers, and C15 1"monobloc was used..."
That's what I will do I thought and without looking further and not consulting anyone, and not even looking in the Rupert book...I need to find a +20 BSA 7-1 BSA B40 piston then... Quick search and I found our friend Mark Francis had just the one and I mean one.. so I bought it...
You would think by now I would know everything about BSA Unit Single engines ? But I have never been into BSA B44's before... and this was when BSA were changing everything daily...
Anyway piston arrived today, and is smack on the right width and the flat top I wanted... But lining up the gudgeon pins, the BSA B40 piston would stick out of the BSA B44 barrel by 7/16". yes the stack height is that much different... so would need a 7/16" compression plate and 7/16" longer push rods... and the engine dropping by this amount in the frame...
What it should have read in that article was that Jock settled on a standard BSA B44 piston and two 1/8" compression plates... I better build the other BSA B40 engine up as well now... to use that piston...
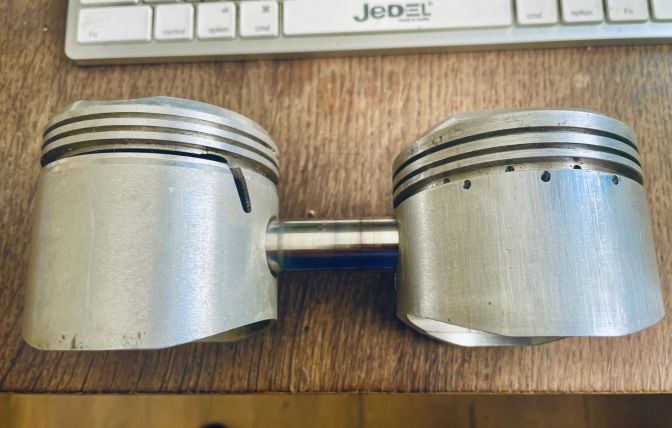
You can see the difference in piston pin height here clearly...
Mike's email...
More from Stuart Kirk from the USA on fitting the liners to the alloy barrel's... good explanation too...
Here's a bit more helpful info from A.Golland's Developmental History of the Gold Star. He devotes 4 paragraphs to the cylinder assembly. I quote from page 28:
"Because of differing coefficients of expansion between the two materials (0.000022 inch for aluminium and 0.000018 inch for austenitic iron) the interference fit between the liner and the barrel had to be such that, a) the liner did not become loose as the engine warmed up and, b) the interference was sufficiently close to give adequate heat transfer from liner to barrel. The chosen limits were, and remained at, 0.003-0045 inch, the liner being pressed in under a load of two tons. The barrel of later years was pre-heated to 220 c and the liner pressed in cold."
So, it looks like you need an austenitic liner with a 3 to 4-1/2 thou interference fit. After you have carefully measured and verified your fit is within limits, freeze the liner overnight (lightly oil it first) then heat the cylinder barrel for assembly. You'll be wearing gloves of course. Its nice to have a thick block of wood with the right size hole bored in it to support the cylinder base. Weighting the top of the liner to prevent "creep" is important too. Set your block on the floor as close to the oven as possible, set your heated cylinder on the block, quickly grab your liner from the freezer and drop it in. Any small amount of frost on the liner will act as a buffer/lubricant as it vaporises in a flash. But,... be ready with tools at hand (another block of wood and a heavy hammer) to tap it fully home if it doesn't drop all the way in. Worst case would be needing to use a press to fully seat it. Once cooled, you will need to rough measure the gap between head and barrel to determine whether a new gasket will be thick enough with your new liner. The top flange may stand a bit too proud creating too much gap for even an unpeeled shim gasket to fill up. You may need to machine the top of the liner to correct a too wide gap measurement...
That explains how to fit the liner well and the 3-4 thou fitting tolarance.
And How to modify a BSA B44 engine for trials...
Pat Slinn gave us an insight in 2008...
Charlie>
Just had a look in one of my books on BSA unit singles, and thought I was right. You need a plate 2.11.mm ( or just over 1/16 of an inch) on a B44 to give you an 8 to 1 compression ratio, if you want 6 to 1 you will need nearly 3mm... as on a B50. I would suggest using copper to make the plate out of...?
"Mr BSA", Pat Slinn, is your man for any tuning tips, etc. Should be an interesting project to get right.
Regard's Charlie.
Pat Slinn…2008...
I used a Amal monobloc 1", I have no experience of Mikuni carburettors on BSA singles. I still retain a Amal monobloc on my 1964 C15. I really can't remember the thickness of the compression plate that I used, 40 years is a long time ago, I know I should have kept more precise records of what I did and used, but in those days people didn't. Today I keep records on my computer and photograph everything. But I can remember that I used a 441cc Victor GP "slipper piston". I do not know of megacycle cams, however some C15, B40, & B44 engine parts are available on ebay, a C15 camshaft was on there recently for the right price.
I played about with a 441 motor during the mid 60's, converting it for trials use. I sleeved the inlet port by turning up an alloy tube and sweated it in to the port, I used a compound called "Devcon" ( I think) to mould the tube to the port and shaped and smoothed it using a rotary file. I think I reduced the port size to 1". I reduced the compression ratio ( I forget by how much now) by making up a simple compression plate from alloy plate to fit beneath the cylinder. I used a C15 trials camshaft and the C15 cam followers. I remember that I found finding a suitable "gearbox" difficult, but I played about with "Victor" and C15/B40 components. The motor was quite good, and I remember that it had very good low down torque, and did super "wheelies" !!.
As Charlie has said the sub frame needs pulling in, and the footrests need to go back. I hung my footrests off the swinging arm spindle, and made up a new rear brake pedal & gear lever.
It sounds like a super project with a lot of scope for development, loads of engine bits turn up on ebay.
Please keep us updated on progress.
Regards,
Pat...
I am glad I found this back out as a referance to what we are trying to build...
Now back to progress or not on the engine strip down...
13/04/2024…
Memo for day …
Sand blast two Mini-Otter frames, and three Foster Otter swinging arms.. Exfoliate face.. Done that tick, with the sand blasting…
Remove chain-case cover from the BSA B44 engine, and clutch if possible…
Bill from Charlie Prescott to Charlie Prescott should read …Three hours to remove chain-case… Not joking, just charging him the hourly rate for building trials bikes £0.0 pence…
Story is the case was fitted with cross-head screws and had probably been in a large field in the Californian climate for the past twenty years, that is what it looked like as after bumping the screws I managed to get two out with a struggle and the seven were a lot more difficult, large screw driver and brother with mole grips onto the handle and we got two more out then I had to use a made up centre pop to loosen four more… but we ended up drilling the last one out, It just did not want to play… So has I said three more hours on the B44 build…
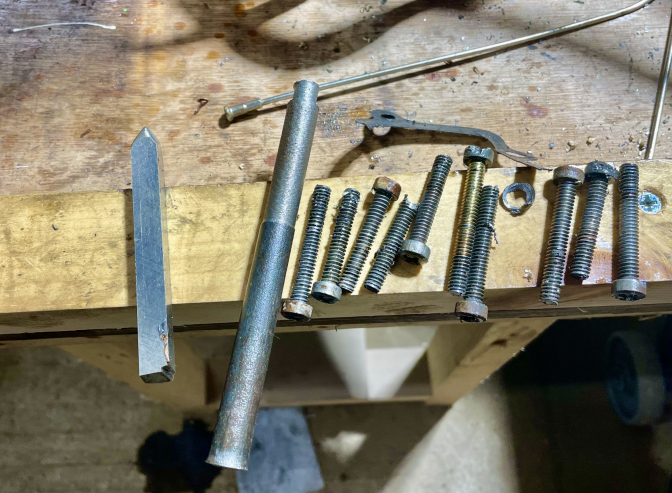
Array of damaged screws and the centre pop and bumper needed on most... and even that did not work on one...
So Sunday 14th today and set my mind at getting the clutch and sprockets off, things did not go well from the start It took a long tube on the power bar to shift the engine alternator sprocket nut, and that was tight all the way off… but then the rotor just lifted off and no key fitted. There were two tiny nuts of unknown size on two of the stator studs and after finding a tiny socket to fit these they also needed a lot of pressure to shift the third was the proper size, it was obvious that the threads had been striped on the other two and they had been rethreaded smaller… Hope the Guy who owned this bike in the USA is watching in… I bet he is laughing…So to the clutch, no wire to snip first to undo the clutch spring screws, and then lifting the steel plates it was obvious that the motor had hardly run and the plates had been swopped about. No lock tab on the gearbox nut either, but it was tight again. Used my puller to loosen the hub from the tapered shaft and thought things were looking up… got to the clutch sprocket back plate and the single slot screws were laughing at me… and the initial attempt to remove them was a waste of time again, I had to centre pop all of them to get a start. Very large 17 tooth 520 gearbox sprocket did come off after centre popping the nut again. And the second hand lock tap had not been tapped up…We are talking three hours again for this far, and after having to cut the primary chain to remove it because of the very large engine sprocket fitted it was obvious again after finding punch marks on the shoulder of it this sprocket it was not falling off. So need a good puller even to attempt the job tomorrow… How many hours as this been so far to strip this engine…
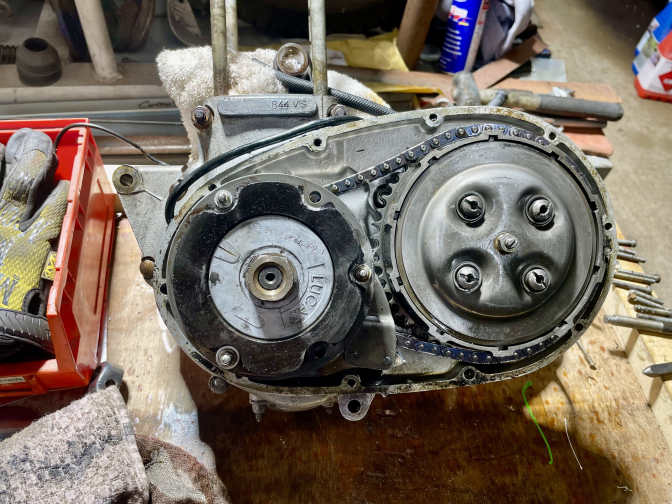
Every thing just so tight on this engine for no reason, just a lot of extra work... you can see the tiny alternator stator nuts as well...
So not being able to get out of my drive for a week because of water main works it is now saturday 20th April to carry on with the engine strip dow and remove that that very large 28 tooth engine sprocket with my best puller it still needed a vast amount of presure to remove it, and it was ouvious that it had been beaton on with a heavy drift and hammer... anyway it is off... and I think I am now going to keep the clutch for another bike and fit one of Pete Kirby's belt drive unit If he has enough parts to put one together ...
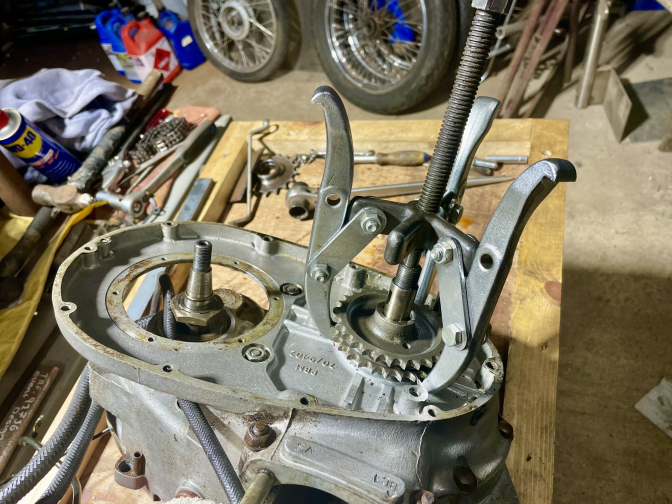
Just look at that sprocket, and the cases had been milled for it to fit... and the slipper chain tensioner shortened...
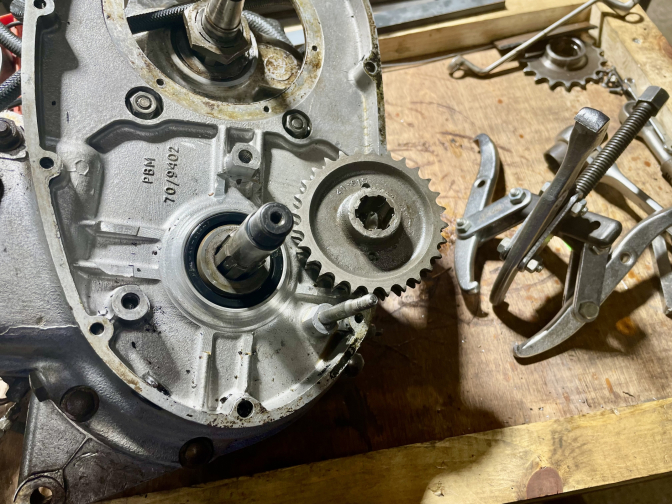
You can see the machined crankcases to take this 28 tooth engine sprocket...(OK...I now know that the BSA B44-50 had the 28 tooth engine sprocket but I have never had a B$$ engine before so did not take note ...) Well this motor has got some torque to run a sprocket that big...
I can see why Mike and Pat say it is easy to do wheelies...
More later when the new parts arrive ...
23/04/2024...
So had a chat with Pete Kirby about a clutch for the B44… and he explained to me that the 28tooth engine sprocket fitted was to take some of the strain away from the BSA C15 clutch fitted to them, and this is the only way they could cope with the extra torque that the engine produces… If you are going down to the 18 tooth size he said, you will need a special 10 plate clutch to cope with that sort of power… I will see what we can do… ring me in ten days he said… I might add that Pete is just getting over surgery to his neck and is not allowed to lift anything more than a cup of tea…
updat 04/2024...
| Visitor Counter: | ||||||||
 |  | |  |  |  |  | ||